GSI Audiometry Equipment: Complete Beginner's Operation Guide
This comprehensive guide provides step-by-step instructions for operating GSI audiometry equipment, designed specifically for beginning audiologists, hearing healthcare professionals, and clinical staff. Whether you're working with the GSI AudioStar Pro, GSI 61, or GSI 18, this manual will ensure safe, accurate, and efficient audiometric testing.
#
Understanding Audiometry Fundamentals
##
What is Audiometry?
Audiometry is the scientific measurement of hearing ability across different frequencies and intensities. GSI audiometers generate precise tones at specific frequencies (typically 125 Hz to 8000 Hz) and intensities (typically -10 dB HL to 120 dB HL) to determine hearing thresholds.
##
Key Audiometric Concepts
Hearing Level (dB HL): Calibrated intensity scale referenced to normal hearing thresholds
Frequency Response: The range of tones the audiometer can generate (measured in Hertz)
Threshold: The softest level at which a patient can detect a tone 50% of the time
Air Conduction: Sound transmission through the outer and middle ear
Bone Conduction: Sound transmission directly to the inner ear via skull vibration
#
Equipment Overview and Setup
##
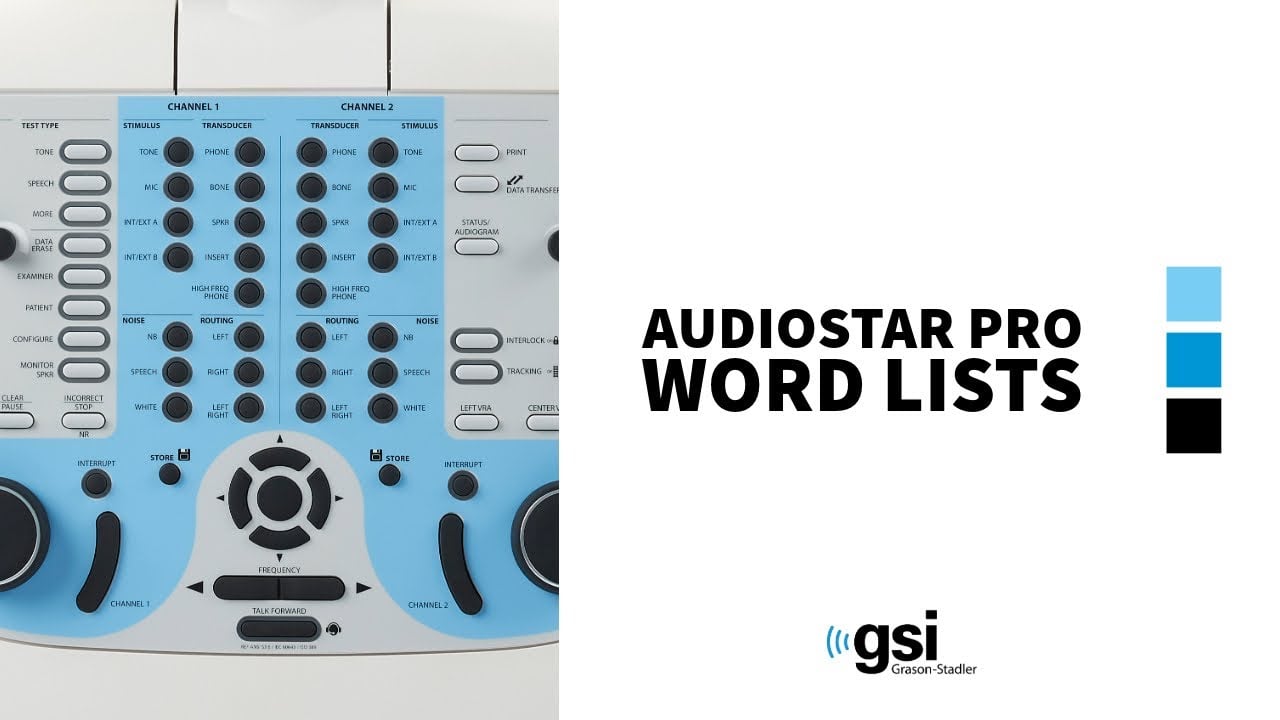
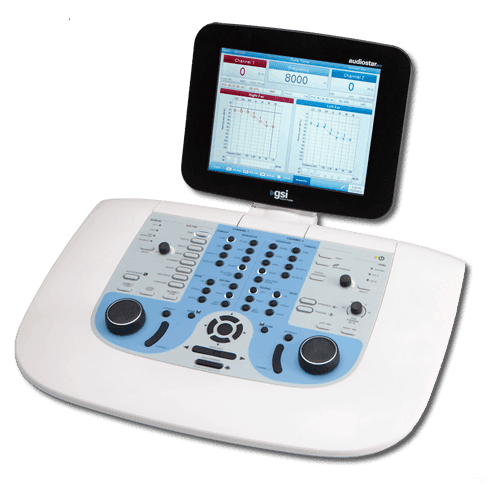
GSI AudioStar Pro Setup
Initial System Preparation:
1. Power Connection: Connect to dedicated power outlet with proper grounding
2. Warm-up Period: Allow 15-minute warm-up before first use daily
3. Environmental Check: Verify ambient noise levels below 40 dB SPL
4. Transducer Connection: Securely attach headphones and bone oscillator
Transducer Configuration:
| Component | Connection Point | Purpose | Verification Check |
|-----------|------------------|---------|--------------------|
| TDH-39 Headphones | Air Conduction Output | Standard air conduction testing | Listen for clear tone generation |
| Insert Earphones | Insert Phone Jack | Improved isolation, collapsing canal testing | Check for proper eartip seal |
| Bone Oscillator | Bone Conduction Output | Bone conduction threshold testing | Verify vibration at all frequencies |
| Talk-Forward Microphone | Microphone Input | Patient communication | Test voice clarity and volume |
Software Navigation:
1. Power on system and wait for startup sequence completion
2. Select appropriate test protocol from main menu
3. Enter patient demographics and test session information
4. Verify calibration status indicators show "PASS" status
5. Select transducer type matching intended test procedure
##
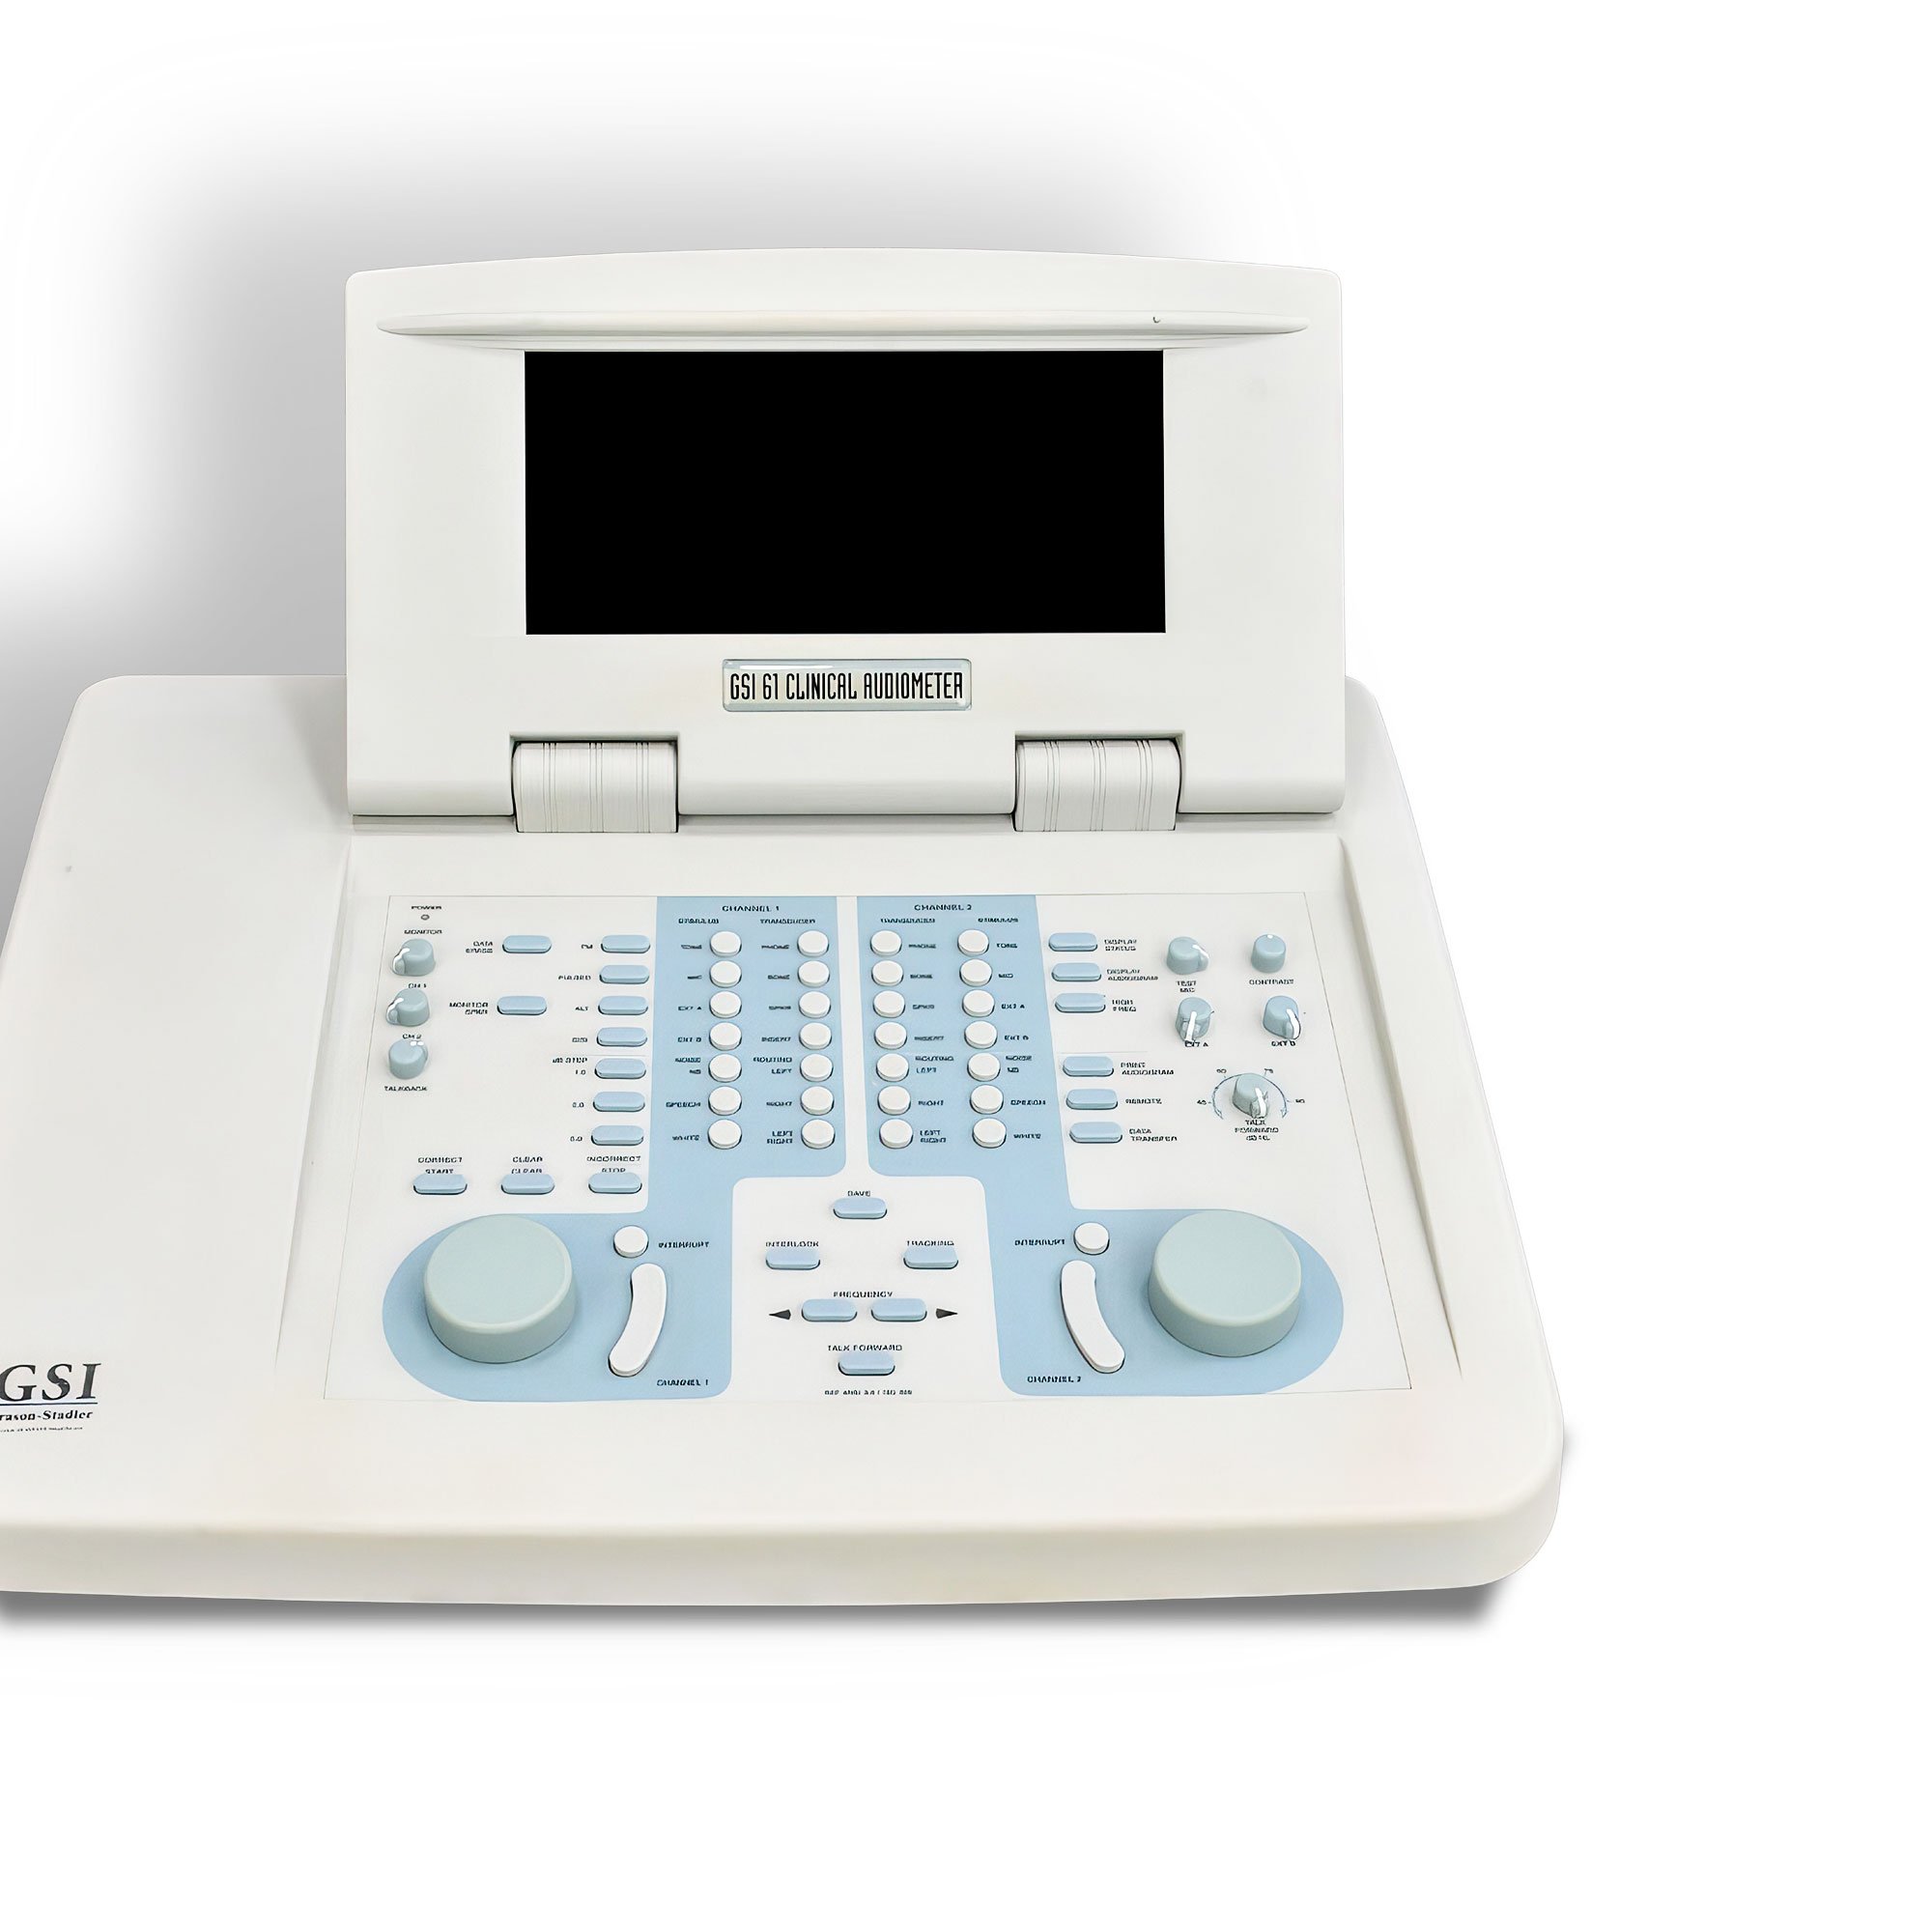
GSI 61 Clinical Audiometer Setup
Manual Control Familiarization:
Pre-Test Setup Sequence:
1. Set all controls to neutral position
2. Connect appropriate transducers to designated outputs
3. Verify channel selection matches intended ear (right/left)
4. Check masking controls in "off" position initially
5. Set intensity to minimum level before beginning testing
##
GSI 18 Screening Audiometer Setup
Portable Configuration:
#
Fundamental Testing Procedures
##
Pre-Test Patient Preparation
Patient Interview:
1. Medical History: Review hearing-related medical history
2. Current Concerns: Document specific hearing complaints or symptoms
3. Medication Review: Identify ototoxic medications or recent changes
4. Noise Exposure: Assess occupational or recreational noise exposure
Physical Examination:
1. Otoscopy: Examine ear canals for wax, foreign objects, or abnormalities
2. Canal Assessment: Check for collapsing ear canals or anatomical variations
3. Infection Screen: Look for signs of active ear infection or inflammation
4. Hearing Aid Check: Remove hearing aids and document settings if applicable
##
Air Conduction Testing - Step by Step
Modified Hughson-Westlake Procedure:
This is the gold standard method for determining hearing thresholds.
Initial Setup:
1. Position patient comfortably facing away from audiometer
2. Explain test procedure: "You will hear beeps in your ears. Press the button when you hear them, no matter how soft."
3. Place headphones with red earphone on right ear, blue on left ear
4. Begin testing with better hearing ear (if known) or right ear
5. Start at 1000 Hz frequency
Threshold Determination Steps:
| Step | Action | Expected Response | Next Action |
|------|--------|------------------|-------------|
| 1 | Present tone at 40 dB HL | Patient responds | Decrease by 10 dB |
| 2 | Continue decreasing by 10 dB | No response | Increase by 5 dB |
| 3 | Present tone at increased level | Response obtained | Decrease by 10 dB |
| 4 | Repeat down 10, up 5 pattern | Establish threshold | Record lowest level with 50% response |
Complete Frequency Sequence:
1. Test frequencies in order: 1000, 2000, 4000, 8000, 1000 (recheck), 500, 250 Hz
2. Retest 1000 Hz to verify reliability (should be within 5 dB)
3. If thresholds differ by more than 20 dB between ears, consider masking
4. Document all responses on audiogram form
##
Bone Conduction Testing
Equipment Preparation:
1. Remove headphones and position bone oscillator on mastoid process
2. Ensure firm contact without excessive pressure
3. Move hair away from contact area
4. Verify oscillator placement 2cm behind and above ear canal
Testing Protocol:
1. Begin at 1000 Hz with intensity 10 dB below air conduction threshold
2. Follow same down 10, up 5 dB threshold seeking procedure
3. Test frequencies: 1000, 2000, 4000, 1000 (recheck), 500, 250 Hz
4. Apply masking to non-test ear when air-bone gaps exceed 10 dB
##
Masking Procedures
When Masking is Required:
Masking Application:
1. Apply narrow-band noise to non-test ear
2. Begin with masking level equal to air conduction threshold of non-test ear
3. Increase masking in 5 dB steps until threshold plateaus
4. Verify adequate masking without overmasking
#
Safety Precautions
⚠️ CRITICAL SAFETY GUIDELINES
- Never exceed 120 dB HL output to prevent acoustic trauma
#
Quality Control Procedures
##
Daily Quality Checks
Biological Calibration Check:
1. Test your own hearing thresholds at 1000 Hz and 4000 Hz
2. Results should be within 5 dB of established baseline
3. If thresholds vary beyond acceptable limits, investigate equipment status
4. Document results in daily QC log
Equipment Function Verification:
1. Check all transducer connections for security
2. Verify tone clarity at multiple frequencies and intensities
3. Test patient response system functionality
4. Confirm proper channel output (right ear = right transducer)
##
Weekly Maintenance Integration
System Performance Check:
1. Perform comprehensive listening check of all transducers
2. Verify display accuracy and control responsiveness
3. Check battery levels (portable units)
4. Clean and disinfect all patient-contact surfaces
#
Common Beginner Mistakes and Solutions
##
Testing Errors
Inadequate Instructions:
Improper Headphone Placement:
Insufficient Warm-up Time:
##
Documentation Errors
Incomplete Patient Information:
Threshold Recording Mistakes:
#
Advanced Features and Functions
##
GSI AudioStar Pro Advanced Capabilities
Automated Testing Protocols:
1. AMTAS (Automated Method for Testing Auditory Sensitivity)
- Self-administered hearing test capability
- Reduces testing time and operator variability
- Provides automated threshold tracking
2. High-Frequency Audiometry
- Extended frequency range testing (9000-20000 Hz)
- Early detection of hearing loss
- Ototoxicity monitoring applications
Data Management Features:
1. Patient database integration
2. Automated report generation
3. Network connectivity for EMR systems
4. Statistical analysis and trending
##
Quality Assurance Integration
Performance Monitoring:
1. Track test-retest reliability metrics
2. Monitor threshold repeatability statistics
3. Analyze operator performance trends
4. Document equipment performance history
Competency Verification:
1. Regular practical skill assessments
2. Written examination requirements
3. Continuing education documentation
4. Annual certification renewal
#
Troubleshooting Common Issues
##
Patient Response Problems
Inconsistent Responses:
No Response to Audible Tones:
##
Equipment Malfunctions
Intermittent Tone Generation:
Calibration Drift:
#
Best Practices for Accurate Results
##
Environmental Optimization
Acoustic Environment:
1. Use sound-treated testing rooms when available
2. Minimize background noise sources
3. Position equipment away from electromagnetic interference
4. Control ambient lighting for patient comfort
Patient Factors:
1. Schedule testing when patients are alert and comfortable
2. Accommodate physical limitations and positioning needs
3. Consider break intervals for lengthy test sessions
4. Monitor for signs of fatigue or discomfort
##
Professional Development
Continuing Education:
1. Attend manufacturer training programs
2. Participate in professional conferences and workshops
3. Maintain current knowledge of testing standards
4. Network with experienced audiometry professionals
Skill Refinement:
1. Practice threshold determination techniques regularly
2. Develop efficient testing protocols
3. Master advanced features and functions
4. Seek feedback from experienced supervisors
#
Conclusion
Mastering GSI audiometry equipment operation requires systematic learning, regular practice, and attention to detail. By following these comprehensive guidelines, beginning practitioners can develop the skills necessary for accurate, efficient, and safe audiometric testing.
Remember that audiometric testing is both an art and a science, requiring technical proficiency combined with patient care skills. Continuous learning and professional development are essential for maintaining competency and providing quality hearing healthcare services.
Always refer to official GSI documentation and seek supervision when learning new procedures or encountering unfamiliar situations. Patient safety and accurate diagnosis depend on proper equipment operation and adherence to established testing protocols.
---
Legal Disclaimer: This operation guide is for educational purposes only. Always follow official GSI operating procedures and seek appropriate supervision during initial training. Proper training and certification are required for clinical audiometric testing.